27/8/2016 - Week 4
ITP
Leanne Faye
Exercise 3a) Zone System; light, middle & dark zones
Exercise 3b) The Ansel Adam's Shot
Lecture:
Today's lecture started of with Mr. Vinod going through and giving us feedbacks on our e-portflio, as per usual. After that, Mr. Vinod gave us a recap on what we have learned for the past few weeks. He asked us a few questions to make sure we are all on the same page. Mr. Vinod also explained and corrected us our mistake we made in the forum questions. He told us to never be doubtful of the facts of the 3 components, or not, we are shooting blindly. The topic for today is the 'Zone System'. Mr. Vinod showed us slides while explaining. After the lecture, we then went on and did exercise 3a) Zone System, outside the classroom then lastly, we were briefed about exercise 3b) The Ansel Adam's Shot, which Mr. Vinod also demonstrated to us on how to do it at home.
Exercise instructions
Exercise 3: Zone System
Having learned that the camera light meter is dumb, because it gives you an average or optimized (middle grey; zone 5) exposure irrespective of the subject matter, execute the plan below to prove the theory and record you thoughts on the matter in your eportfolio.
Exercise 3(a): Zone System; light, middle & dark zones (5%)
Capture three subjects: one light zones, middle zones and dark zones.
Take two images for each subject, one exposure according to the camera's light meter and the other according to the zone you believe the image falls under.
Ensure that the subjects you choose for each zone area (light, middle dark) have a good range of tones within the zone's area. As an example if you are capturing a subject that falls under the light zone and the subject is a white wall, it is only going to have 1 shade of the light zone, so avoid such subject matters, choose subjects that have a healthy tonal range within the white zone. An example of a suitable subject has been posted in the FB group.
All pictures must be in black and white.
Marking Criteria: The student must show evidence of using the Zone System technique to capture an ‘accurate exposure’ of a subject with light tones, a subject with middle tones and a subject with dark tones. An accurate exposure entails ‘visible tonal values and details’ in all three tonal areas.
Learning goal: Students will be able to prove that the exposure meter isn’t always accurate. Students will be able to use the Zone System to capture an accurate exposure.
Learning outcome 1: Students will be able to use exposure settings (Aperture, Shutter Speed & ISO).
Learning outcome 3: Students will be able to distinguish a bad exposure from a good exposure.
Learning outcome 2: Students will be able to use the Zone System exposure technique to achieve desired results.
Exercise 3(b): The Ansel Adam's Shot (5%)
Choose an image worthy of being called an Ansel Adam's shot (Still Life, Landscape or Portrait).
In using the Zone System sketch and write down the perceived zones in the desired image and indicate the ISO, Aperture and Shutter Speed used. Identify the point of interest and state the exposure settings recommended by the camera light meter and your improved settings upon using the zone system. The image captured must fulfill the following criteria:
Marking Criteria: Students must show evidence of using the Zone System. Student must produce 1 black & white image that captures depth and richness in tonal value by capturing light, middle and dark tones while maintaining details (texture and tone) in the dark and light areas of the image.
Learning goal: Students will be able to use the Zone System to capture an accurate and desired exposure of a real-life scene with a wide range of tonal values.
Learning outcome 1: Students will be able to use exposure settings (Aperture, Shutter Speed & ISO).
Learning outcome 3: Students will be able to distinguish a bad exposure from a good exposure.
Learning outcome 2: Students will be able to use the Zone System exposure technique to achieve desired results.
Dark Zones
1st Attempt:


Middle Zones


Light Zone
1st Attempt:


Further references:
Video material on the Zone System:


Basics on Zone System - http://clickitupanotch.com/2013/01/zone-system-the-basics/
Understanding & Using the Zone System - http://photography.tutsplus.com/tutorials/understanding-using-ansel-adams-zone-system--photo-5607
ITP
Leanne Faye
Exercise 3a) Zone System; light, middle & dark zones
Exercise 3b) The Ansel Adam's Shot
Lecture:
Today's lecture started of with Mr. Vinod going through and giving us feedbacks on our e-portflio, as per usual. After that, Mr. Vinod gave us a recap on what we have learned for the past few weeks. He asked us a few questions to make sure we are all on the same page. Mr. Vinod also explained and corrected us our mistake we made in the forum questions. He told us to never be doubtful of the facts of the 3 components, or not, we are shooting blindly. The topic for today is the 'Zone System'. Mr. Vinod showed us slides while explaining. After the lecture, we then went on and did exercise 3a) Zone System, outside the classroom then lastly, we were briefed about exercise 3b) The Ansel Adam's Shot, which Mr. Vinod also demonstrated to us on how to do it at home.
Exercise instructions
Having learned that the camera light meter is dumb, because it gives you an average or optimized (middle grey; zone 5) exposure irrespective of the subject matter, execute the plan below to prove the theory and record you thoughts on the matter in your eportfolio.
Exercise 3(a): Zone System; light, middle & dark zones (5%)
Capture three subjects: one light zones, middle zones and dark zones.
Take two images for each subject, one exposure according to the camera's light meter and the other according to the zone you believe the image falls under.
Ensure that the subjects you choose for each zone area (light, middle dark) have a good range of tones within the zone's area. As an example if you are capturing a subject that falls under the light zone and the subject is a white wall, it is only going to have 1 shade of the light zone, so avoid such subject matters, choose subjects that have a healthy tonal range within the white zone. An example of a suitable subject has been posted in the FB group.
All pictures must be in black and white.
Marking Criteria: The student must show evidence of using the Zone System technique to capture an ‘accurate exposure’ of a subject with light tones, a subject with middle tones and a subject with dark tones. An accurate exposure entails ‘visible tonal values and details’ in all three tonal areas.
Learning goal: Students will be able to prove that the exposure meter isn’t always accurate. Students will be able to use the Zone System to capture an accurate exposure.
Learning outcome 1: Students will be able to use exposure settings (Aperture, Shutter Speed & ISO).
Learning outcome 3: Students will be able to distinguish a bad exposure from a good exposure.
Learning outcome 2: Students will be able to use the Zone System exposure technique to achieve desired results.
Exercise 3(b): The Ansel Adam's Shot (5%)
Choose an image worthy of being called an Ansel Adam's shot (Still Life, Landscape or Portrait).
In using the Zone System sketch and write down the perceived zones in the desired image and indicate the ISO, Aperture and Shutter Speed used. Identify the point of interest and state the exposure settings recommended by the camera light meter and your improved settings upon using the zone system. The image captured must fulfill the following criteria:
Marking Criteria: Students must show evidence of using the Zone System. Student must produce 1 black & white image that captures depth and richness in tonal value by capturing light, middle and dark tones while maintaining details (texture and tone) in the dark and light areas of the image.
Learning goal: Students will be able to use the Zone System to capture an accurate and desired exposure of a real-life scene with a wide range of tonal values.
Learning outcome 1: Students will be able to use exposure settings (Aperture, Shutter Speed & ISO).
Learning outcome 3: Students will be able to distinguish a bad exposure from a good exposure.
Learning outcome 2: Students will be able to use the Zone System exposure technique to achieve desired results.
Exercise 3(a): Zone System; light, middle & dark zones
Dark Zones
1st Attempt:

ZONE 5, 2.5", F5.6, ISO 200, Light Meter 0

ZONE 3, O.6", F5.6, ISO 200, Light Meter -2
2nd Attempt:

ZONE 5, 0.6", F5.6, ISO 200, Light Meter 0

ZONE 3, 1/8, F5.6, ISO 200, Light Meter -2
3rd Attempt:

ZONE 5, 0.5", F5.6, ISO 200, Light Meter 0

ZONE 3, 1/8, F5.6, ISO 200, Light Meter -2
4th Attempt:

ZONE 5, 0.6", F5.6, ISO 200, Light Meter 0

ZONE 3, 1/6, F5.6, ISO 200, Light Meter -2
5th Attempt:

ZONE 5, 0.6", F5.6, ISO 200, Light Meter 0

ZONE 3, 1/8, F5.6, ISO 200, Light Meter -2
Middle Zones

ZONE 5, 1/30, F5.6, ISO 200, Light Meter 0

ZONE 5, 1/30, F5.6, ISO 200, Light Meter 0
Light Zone
1st Attempt:

ZONE 5, 1/125, F5.6, ISO 200, Light Meter 0

ZONE 7, 1/30, F5.6, ISO 200, Light Meter 2
2nd Attempt:

ZONE 5, 1/125, F5.6, ISO 200, Light Meter 0

ZONE 7, 1/25, F5.6, ISO 200, Light Meter 2
3rd Attempt:

ZONE 5, 1/200, F5.6, ISO 200, Light Meter 0

ZONE 7, 1/50, F5.6, ISO 200, Light Meter 2
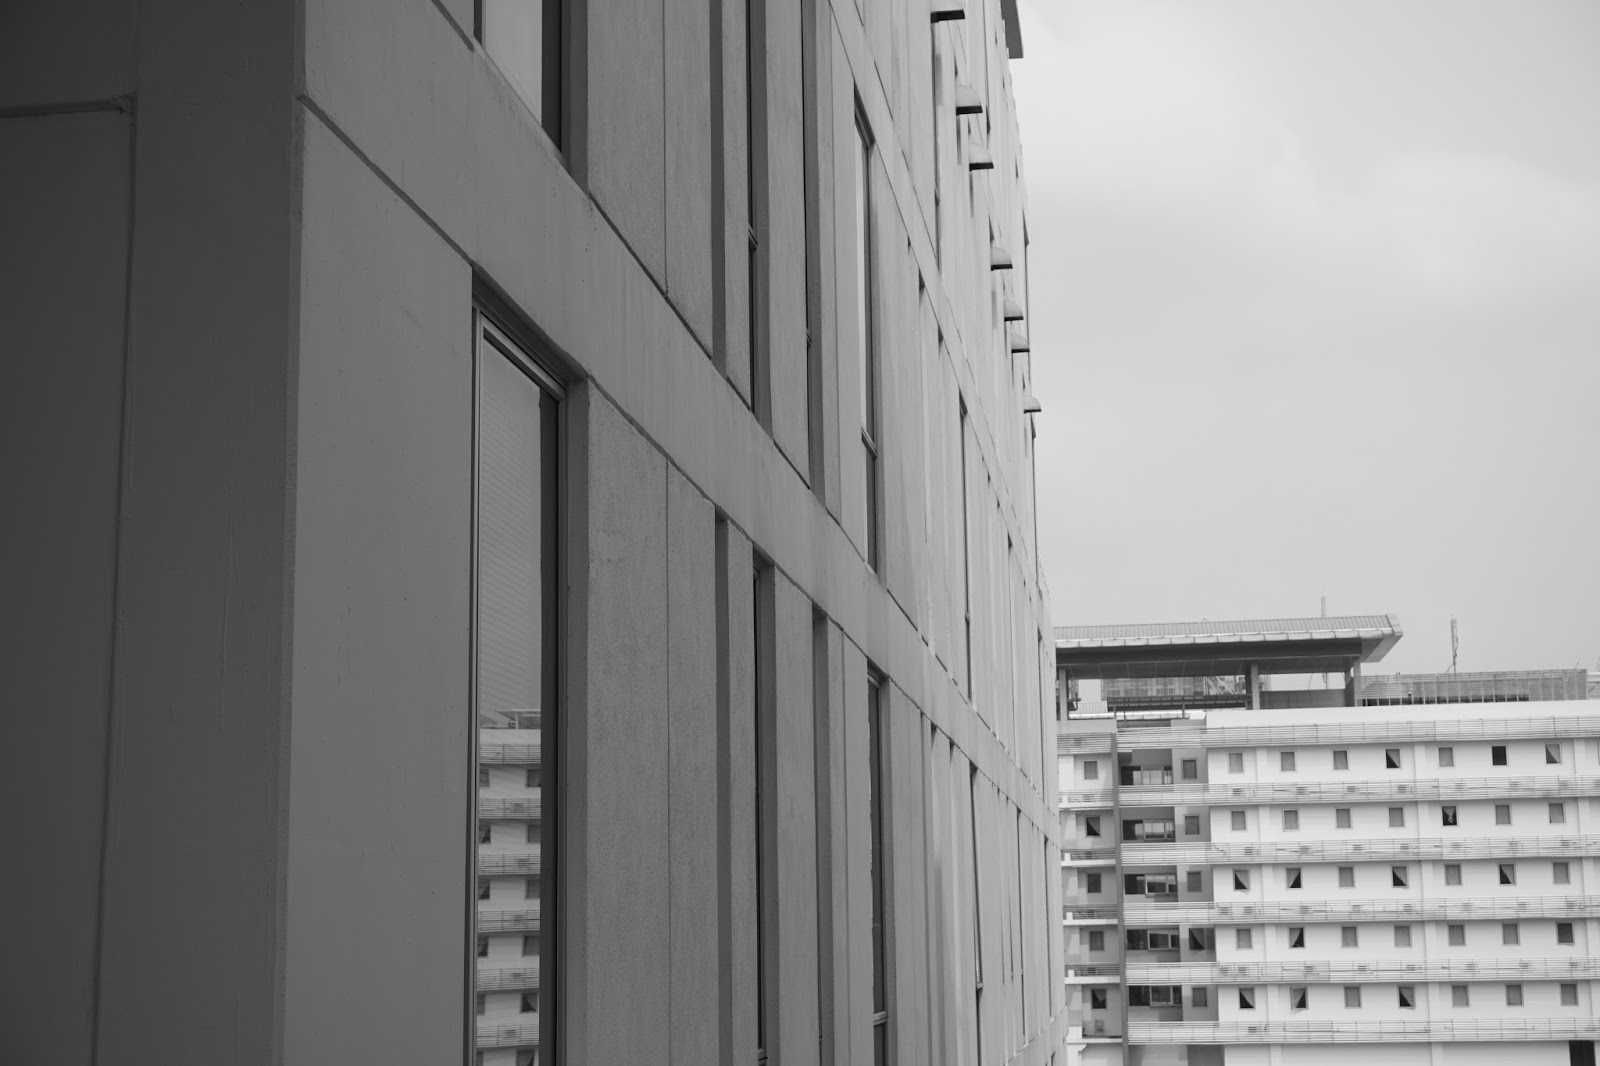
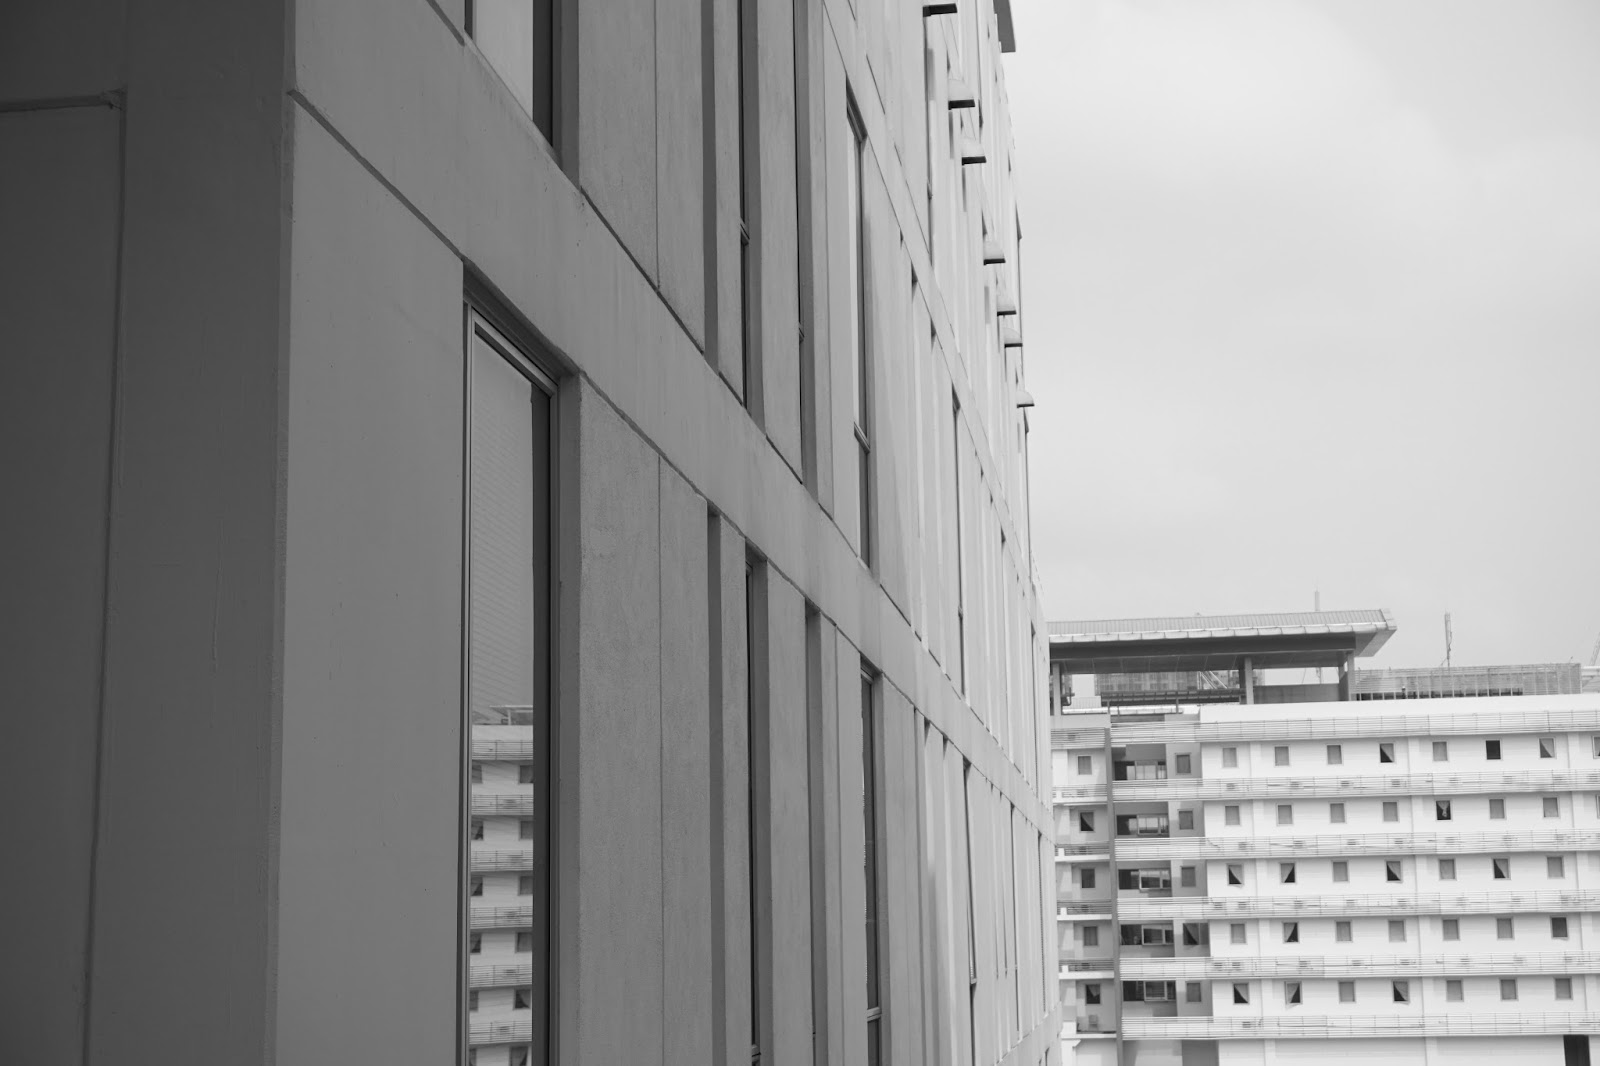
Exercise 3(b): The Ansel Adam's Shot
1st Attempt:

Sketch:

2nd Attempt:

Sketch:


ZONE 4, 1/20, F11, ISO 200, Light Meter -1

2nd Attempt:

ZONE 4, 1/15, F11, ISO 200, Light Meter -1

Screenshots:


Feedback:
Good attempts at experimenting in exercise 3a (dark). Overall you have been able to showcase evidence in exercise 3a that the in-built exposure meter is in accurate when taking pictures of dark or light subjects. In exercise 3b, the image captured was well exposed and composed but the image in itself was rather messy. The second attempt at 3b was better in terms of subject matter. However you can do better.
Reflection:
Experience
Today, I had many struggles with the exercises. Some of my classmates are getting the shots correct in one or two attempts, while I only got it right after at least 3 or 4 attempts. Most of the shots I took lost details and textures therefore, I had to retake. The shot I struggled a lot was exercise 3a. Dark Zones, but with the help of my classmates, they suggested me to change my subject matter. So, we arranged bags, chairs and asked one of my classmates who was wearing black to sit beside it. I finally got a better shot than the previous shots where I only used a chair as a subject matter. After that, we also helped Hun, our classmate, out with his shots. I also borrowed Hun my camera because his camera ran out of batteries.
When doing exercise 3b), I had no idea what I wanted to take. I then decided to go to the park. I had to do a quick sketch of the scene and label it which was a bit tricky because the sunlight is constantly changing. It felt really good to get out and experience shooting outdoors despite the mosquitoes. Anyways, the overall experience was good because you get so much scenes to capture and all sorts of compositions.
When doing exercise 3b), I had no idea what I wanted to take. I then decided to go to the park. I had to do a quick sketch of the scene and label it which was a bit tricky because the sunlight is constantly changing. It felt really good to get out and experience shooting outdoors despite the mosquitoes. Anyways, the overall experience was good because you get so much scenes to capture and all sorts of compositions.
Observations
While doing exercise 3a), I realised that the pictures I took loss details and textures which means I did not achieve the right exposure. I realised that the subject matter that we are taking is very important as it must have different tonal range and lots of details. The reason why we can see objects is because it is reflecting light but the exposure meter is dumb and it does not know what it is taking. Therefore, we have to observe and get the right exposure in this exercise then what we see is what we get. For exercise 3b), I realised that composition is key. We must have a healthy tonal range, dark, middle and light, all in one picture just like how Ansel Adam composite his picture yet not losing the details.
While doing exercise 3a), I realised that the pictures I took loss details and textures which means I did not achieve the right exposure. I realised that the subject matter that we are taking is very important as it must have different tonal range and lots of details. The reason why we can see objects is because it is reflecting light but the exposure meter is dumb and it does not know what it is taking. Therefore, we have to observe and get the right exposure in this exercise then what we see is what we get. For exercise 3b), I realised that composition is key. We must have a healthy tonal range, dark, middle and light, all in one picture just like how Ansel Adam composite his picture yet not losing the details.
Findings
For the forum, I understand why is the sync speed is 1/125. We will only get partial of the image if the shutter speed is faster than the flash because it does not sync. Always set ISO and aperture first, following by shutter speed.
What I have learned today is that the exposure meter is light meter but the difference between these two is a light meter is something you can hold in your hand and measure light but exposure meter is in-built in our cameras. The exposure meter is dumb, really dumb. I doesn't know what it is taking therefore, if you point it at anything, the exposure meter will always give you a Zone 5 (Middle Zone) even if we point it at a black shirt or white cap. The exposure meter gives a safe exposure which is middle grey Zone 5. A good photograph will have a healthy tonal range and white and black will still have details. The goal is to achieve optimum image and good quality. Below Zone 3, it slowly lose details but Zone 4 is dark yet very detail. Photography without sufficient light will look bad resulting an image which is not crisp, clear and poor tonality.
While doing the exercises, we must determine which zone it falls under and our point of interest must be clear and have a good range of tonality. For exercise 3a), I was using tube lights for the first few attempts so that is why the pictures turned out bad. The moment I switched to natural sunlight, the picture got so much better. So, lesson learned - never use tube lights. As for exercise 3b), I find nature has a healthier range of tone than man-made objects so instead of plain walls, I used the trees and grass as a canvas for my point of interest.


Notes from the lecture

Forum Questions

My answers
Mr. Vinod's reply
Video material on the Zone System:
Reading materials


Basics on Zone System - http://clickitupanotch.com/2013/01/zone-system-the-basics/
Understanding & Using the Zone System - http://photography.tutsplus.com/tutorials/understanding-using-ansel-adams-zone-system--photo-5607